We’ve all heard that “a picture is worth a thousand words” and know it has some truth to it. As cabin property managers in the Gatlinburg / Pigeon Forge area, I’ve learned to take that old adage seriously! No matter how well-written your airbnb/vrbo listings are, photos are the first thing people look at when evaluating their rental options.
Good images speak for themselves. They make you stand out from the competition and influence all your metrics, from search results to listing views and booking ratio.
Guests will only read your description if they like your photos first. Ultimately, that’s what drives their decision and drives them further down the “buy path”. Investing time and effort into improving the visual assets of your listing will not only drive more bookings but also increase your nightly rate. Let’s consider the three rental cabins below. They all sit beside each other in Pigeon Forge, TN and have similar designs and décor. All have good reviews. Two of them have excellent visuals, but the third one lags behind its potential.


By comparing the three cabins, we can see the power of good photography in increasing the nightly rates. The average nightly rate of the Uncle Buck’s Cabin is 100% more than Pinewood Lodge, and Groundhog Heaven is up by 64%.
Pinewood Lodge has some photographic improvements to make, but where exactly?
In this case study, we’ll break down what the other cabins are doing right that Pinewood isn’t and give you a crash course on how good photos can increase your nightly fee by at least 50%.
Things to Have in Mind Before You Shoot
Before you start clicking, here are some things to consider:
What to Photograph?
When it comes to photos, less is not more. In the digital age, you can always take more photos. A rule of thumb is to photograph every space your guests can access on your property and to have multiple pictures of each room — at least three, wide-angle, mid-range, and close-up.
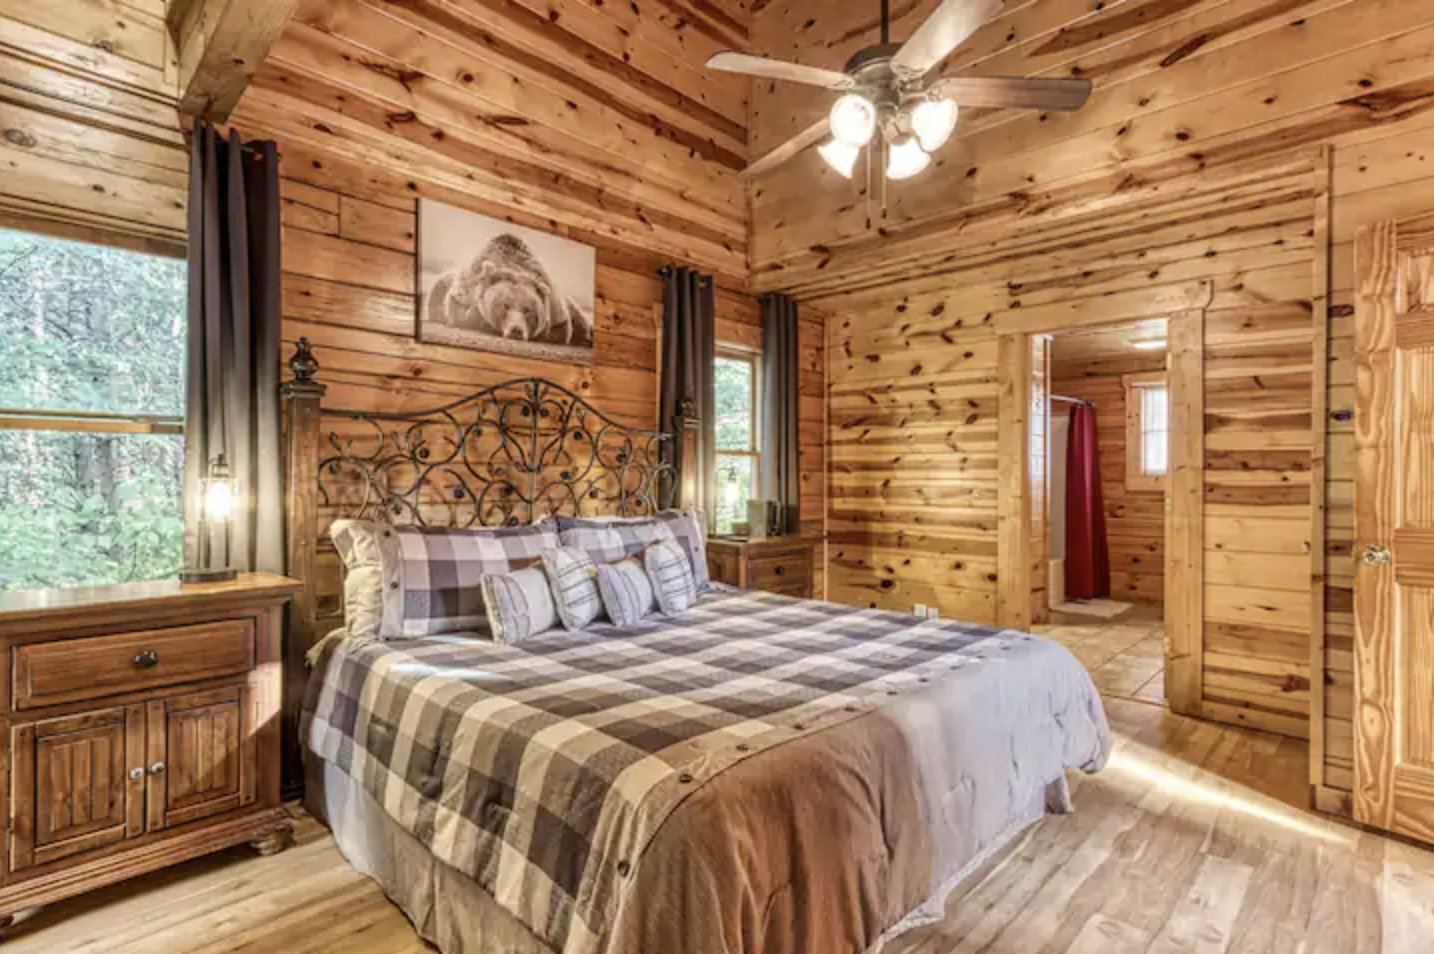 | 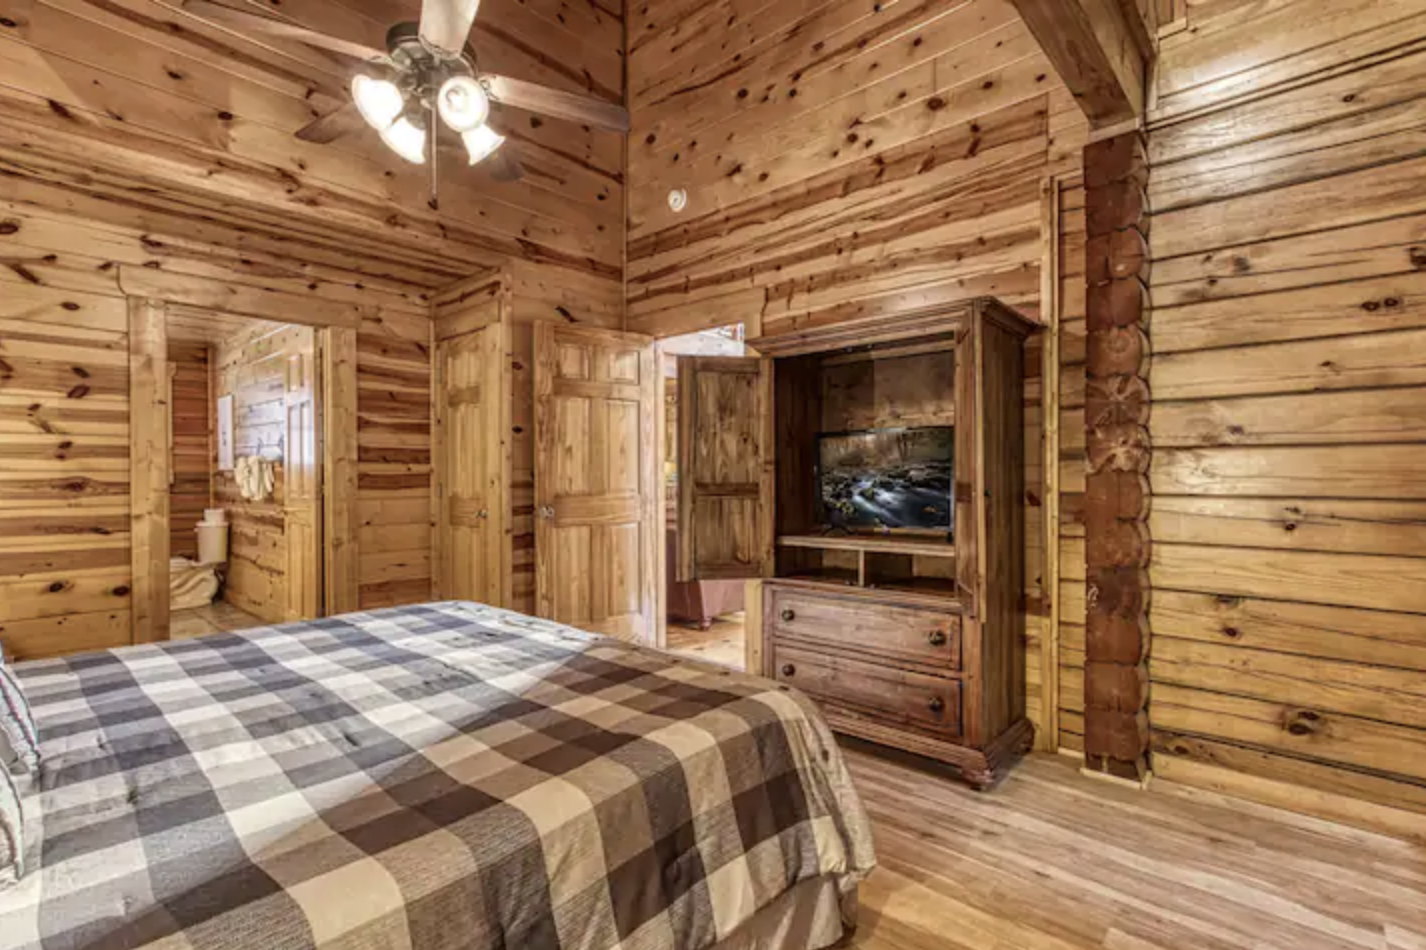 | 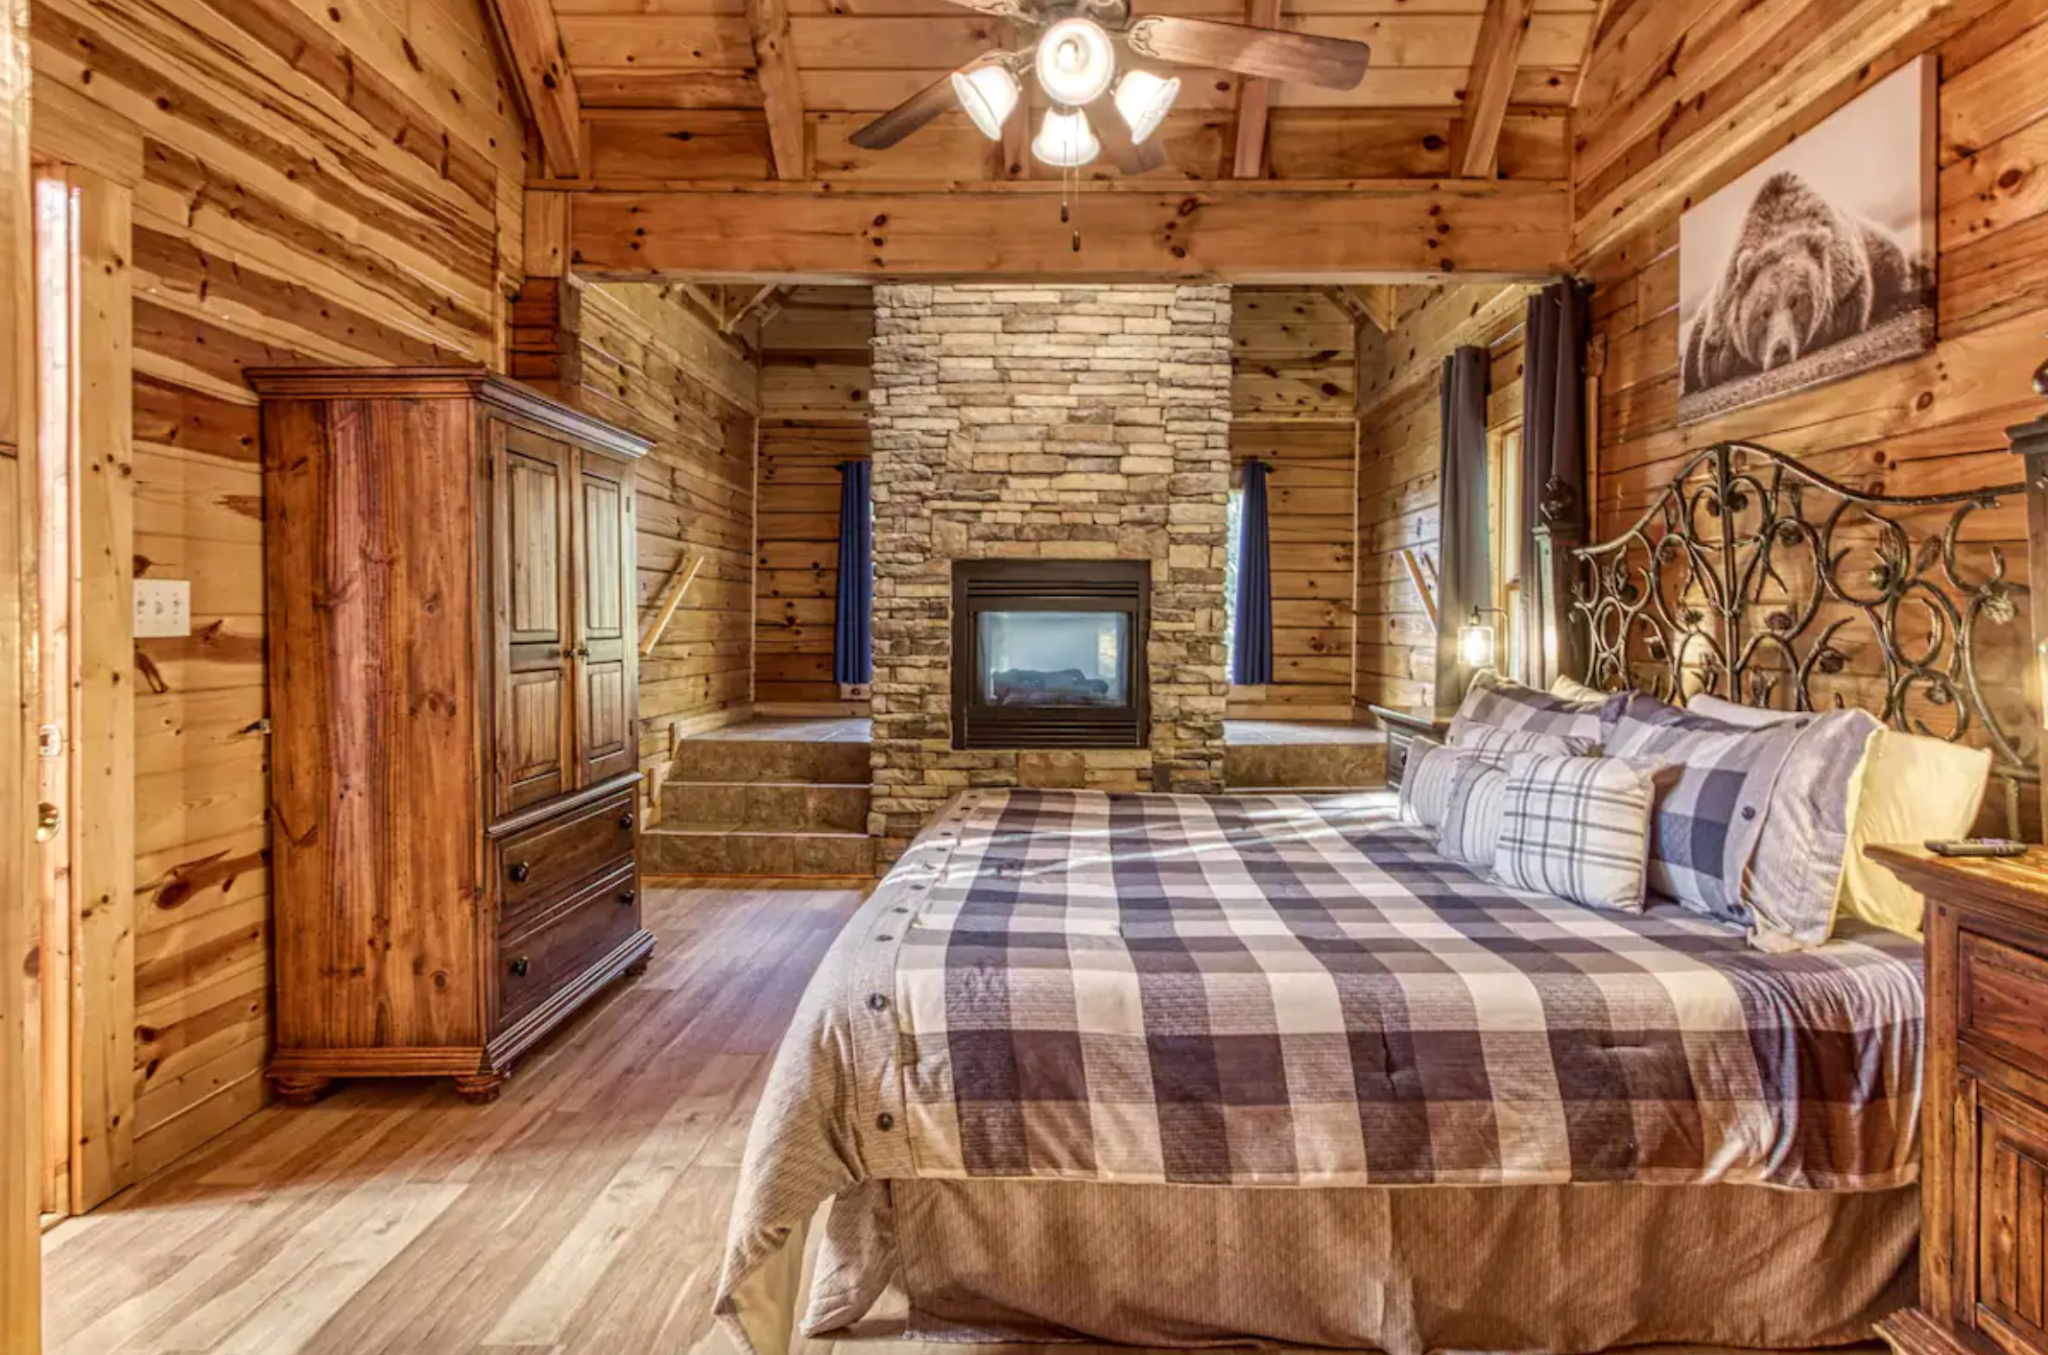 |
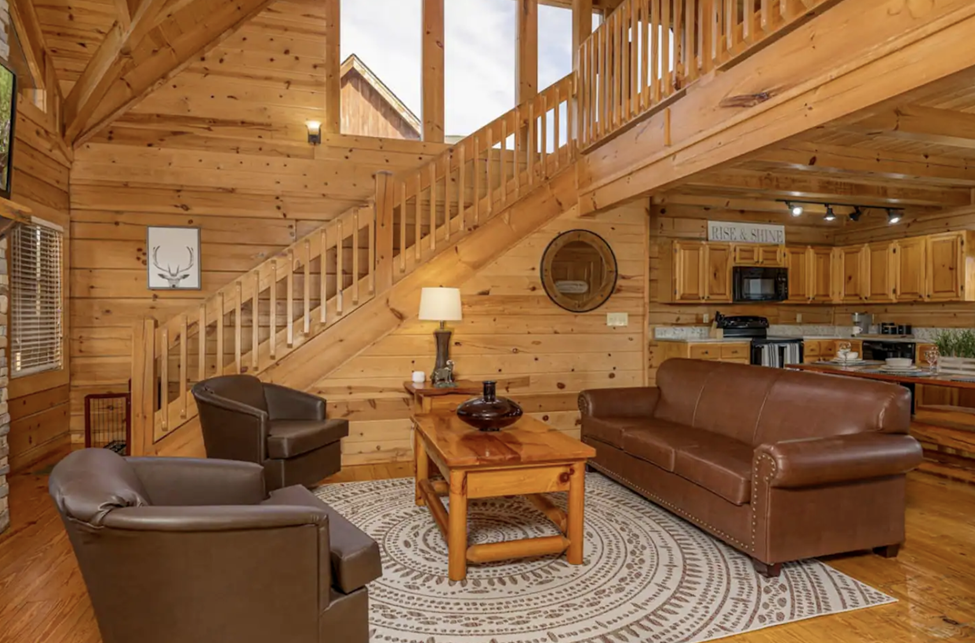
Uncle Buck’s Cabin does a great job of showing multiple angles of the same master bedroom, which reveals more about the room and shows every detail, piece of furniture, and feature. This helps to answer questions such as, is there a TV in the room? How far is it from the bathroom?
It helps to anticipate the questions your potential guests might have. For instance, they might wonder how many people they can sit in the living room or if your kitchen is well equipped. When shooting your property, consider these questions and try to answer them with what you’re capturing.
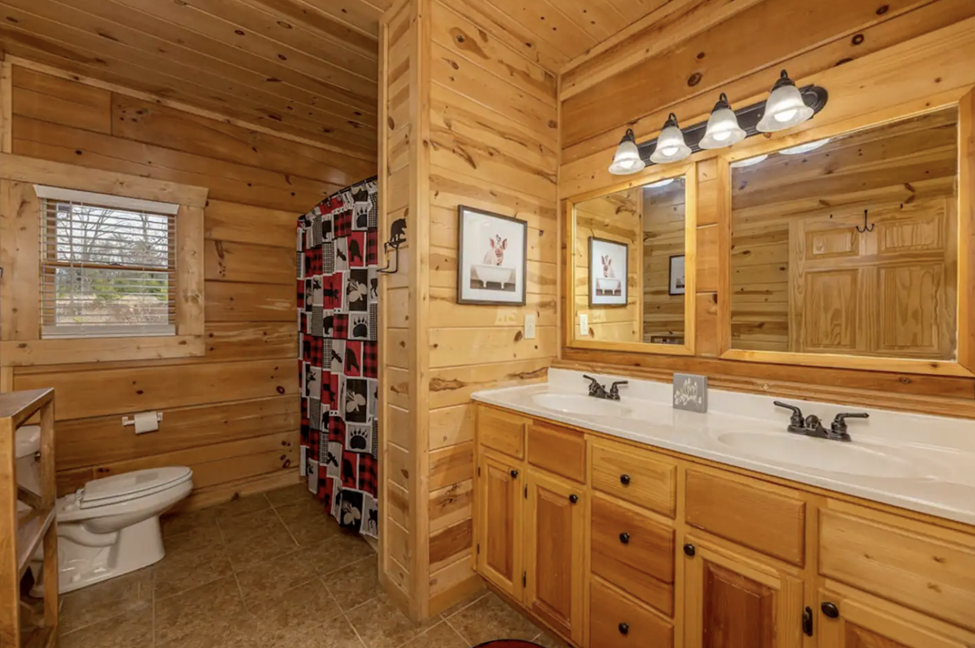
This picture of the bathroom at the Pinewood Lodge could have been more helpful by showing bath and hand towels and perhaps a nice soap bottle. Instead, potential guests are left wondering: what kind of toiletries do they provide? The lighting in the room is also uneven.
Photographic Logic
When photographing your place, it’s a good idea to consider the “wow” factor of your property and think of its most important spaces. The formula below usually works for us:
- First, you want at least four focus shots of the unique features and comforts that make the place special.
- Then, you can click the common spaces, such as the living room, kitchen, and game room.
- Thirdly, head outside and photograph your deck and the view.
- Finally, make sure to photograph all bedrooms and bathrooms.
Once these boxes are checked, move on to photograph the rest of the property. This logic will not only make your photo session easier, but it’ll also help you organize your album later.
 |  |
When photographing your space, think about the “wow” factor that will grasp the viewer’s attention. Groundhog Heaven has several pictures focusing on the jacuzzi and the fireplace because these are outstanding features and comforts of the cabin.
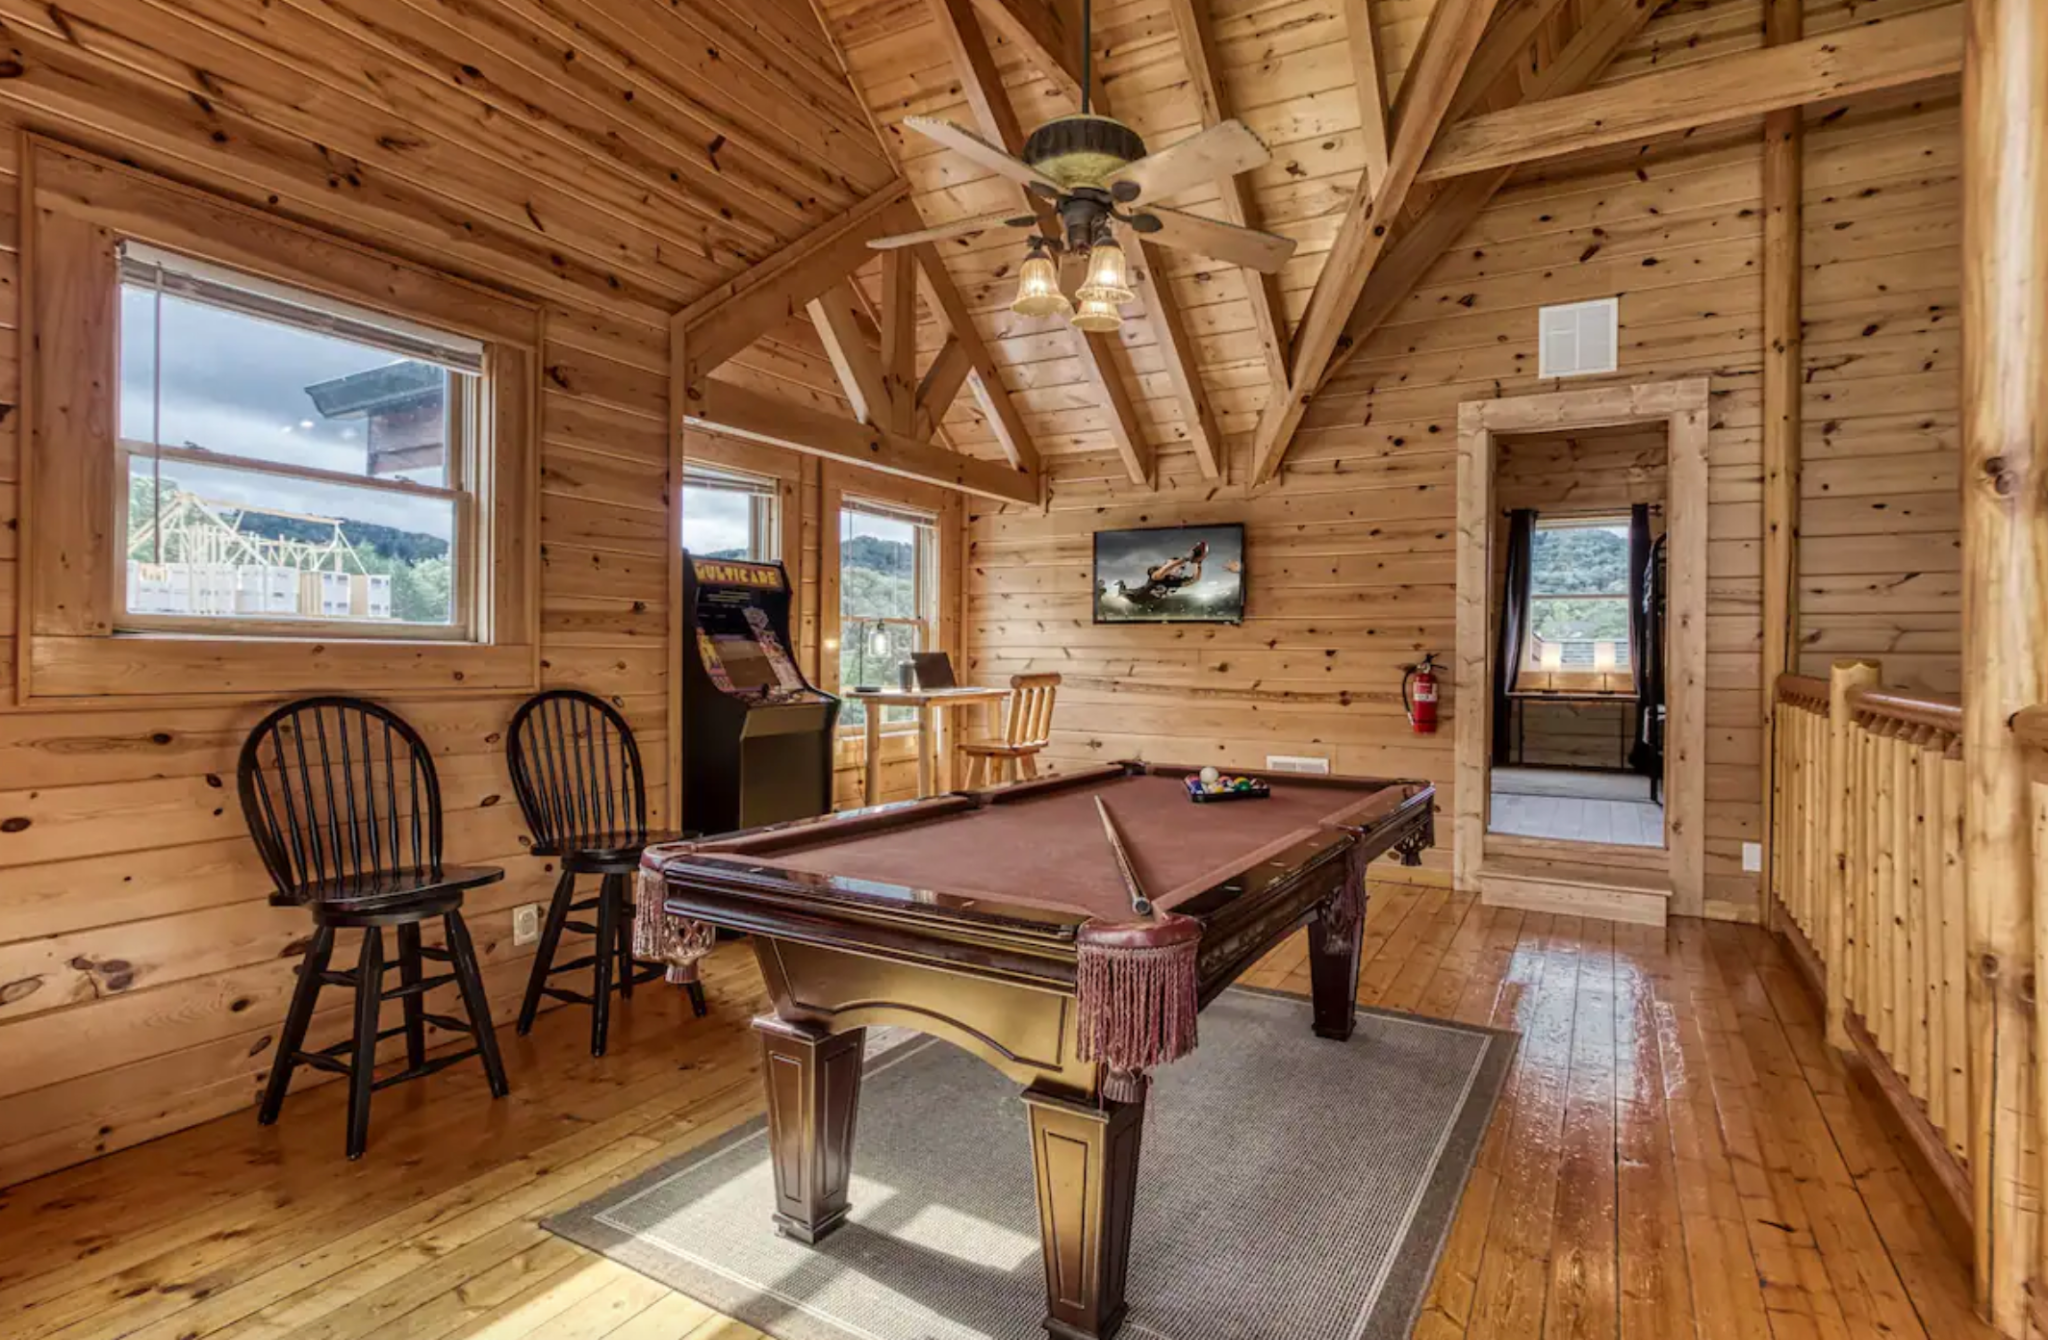 |  |
You can also give your potential guest a sense of what the floor plan is like in your cabin. When looking at these photos of the Groundhog Heaven, we can tell that the game room is on the mezzanine and connects to a bedroom and the living downstairs.
The Hero Image
Not all images are equal; there’s one that matters the most. The hero image acts as your banner and usually appears more prominently in the album. Think of the hero image as the first glimpse anyone will have of your property — so use it to grab their eyes.
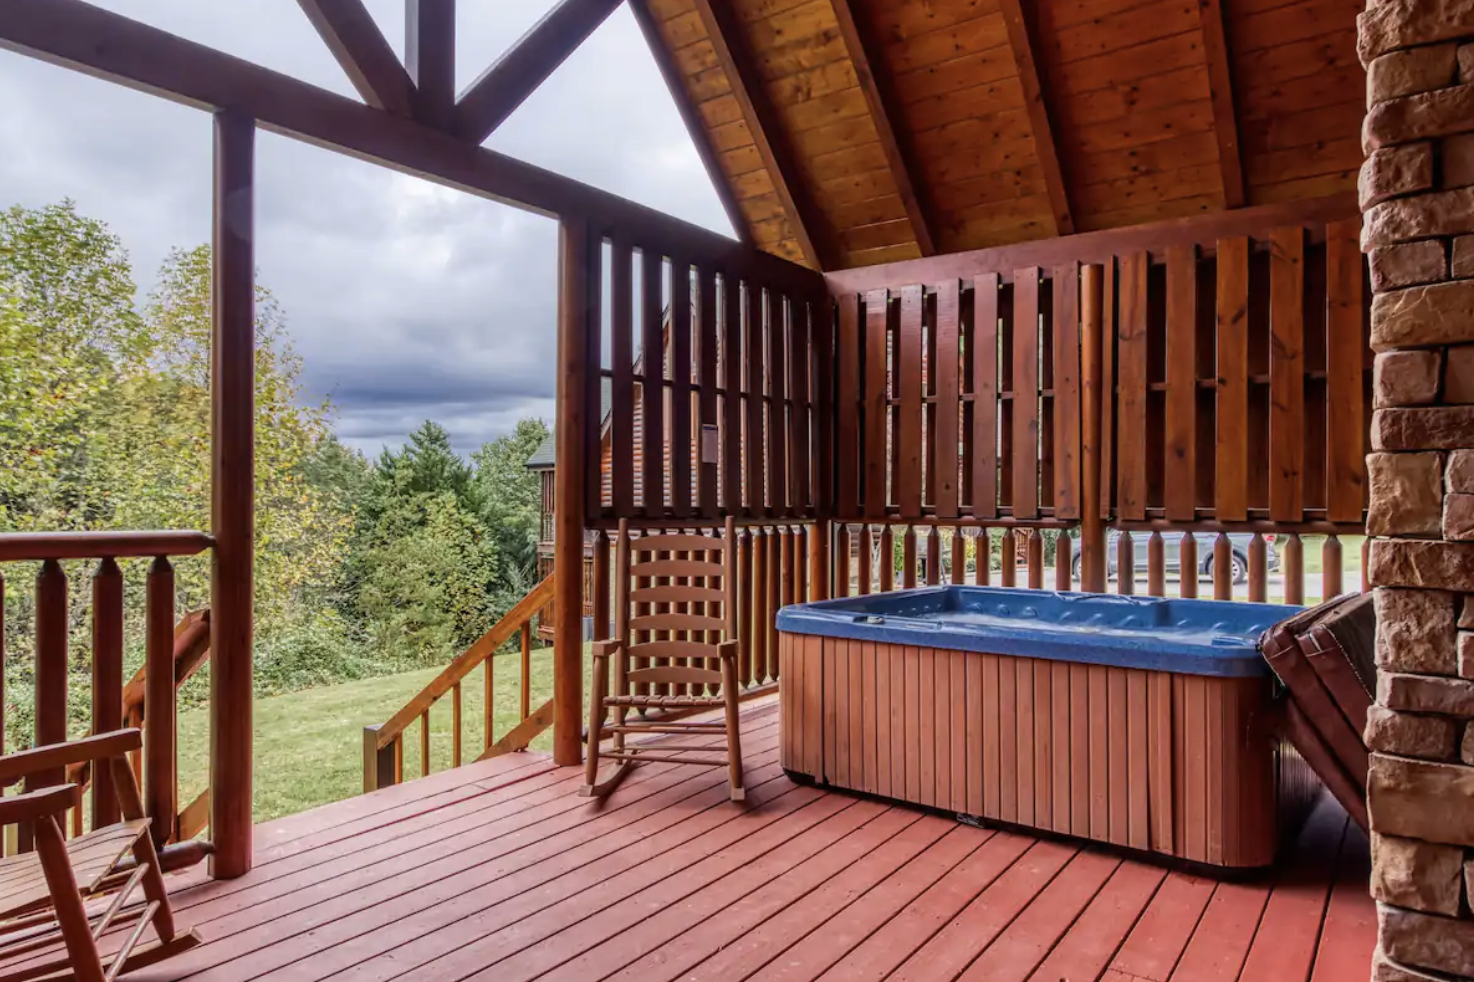
Groundhog Heaven featured a jacuzzi in the hero image and showed plenty of nature outside the cabin. This choice will instantly inspire viewers looking for a relaxing time in nature to click and see more.
Don’t be humble with this one. It’s okay to oversell your place a little. This picture should represent the allure of the entire property and provoke emotions in your potential guests. Keep in mind this often is NOT the front elevation shot as that isn’t what draws people in best… We want an emotional pull!
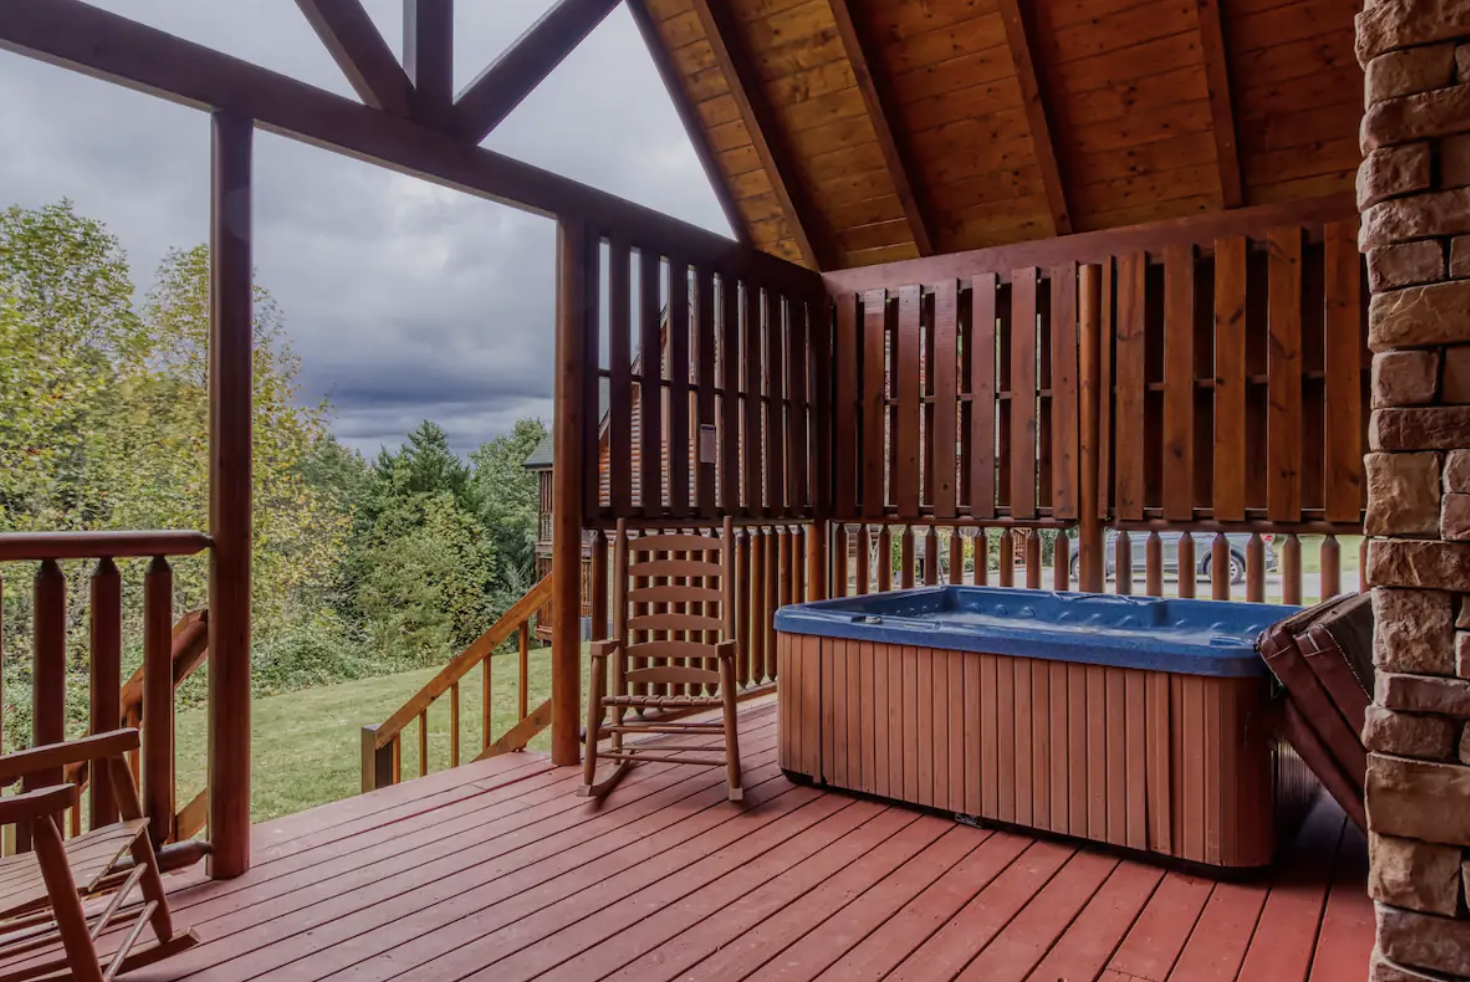
Hot tubs are the most commonly requested amenity in the Great Smoky Mountains, so it’s common that is used for the photo.
Owners will often think the view is the most important, but our testing doesn’t bear that out. A view WITH an amenity like a hot tub is the sweet spot. If that doesn’t exist then a cozy interior shot or game room shot are a likely second place to look.
The Optimal Group
Airbnb, VRBO, and most platforms organize pictures to offer a sneak peek into your property with a group of four or five shots that appear first in a gallery view before the user opens the entire album. Similar to the hero image, this mix will offer your guests a good idea of your property without revealing all the details.
Think about what are the key features of your property. Does it have a game room? What are the remarkable details that add extra charm and personality? What’s around it? The goal is to summarize everything, but with a certain logic, showing your potential guests the value they are about to get.
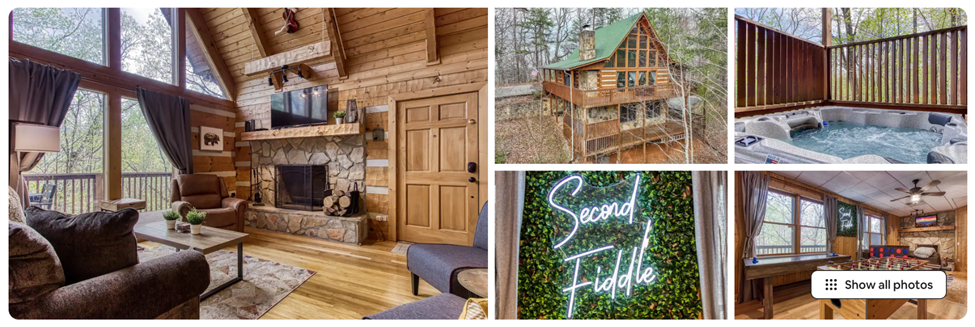
This selection of images from the Second Fiddle Cabin gives a complete sense of what the property and surroundings are like: a comfortable and spacious living room near nature with spaces for fun and relaxation. It also includes a lovely neon detail for a touch of personality.
Things to Have in Mind During Your Shoot
When the time comes, think about the tips below:
Make Use of Natural Light
Always try to photograph your property during the day — and with open curtains. Natural light makes your photos look better, even when snapping interiors, and will lend them a more authentic feel and natural aesthetic. Not to be wasteful, but even if the sun is out, switch on all lights in the room, including table lamps, hanging lighting, and even concealed lights that you might have in the bathroom or kitchen, for instance. Doing so will reduce any differences in brightness between the interior and exterior and leads to a better outcome.
Consider the light conditions outside, even when photographing interiors. Because it’s clouded, this shot from the Pinewood Lodge is mainly illuminated by artificial light, which doesn’t favor coloring.
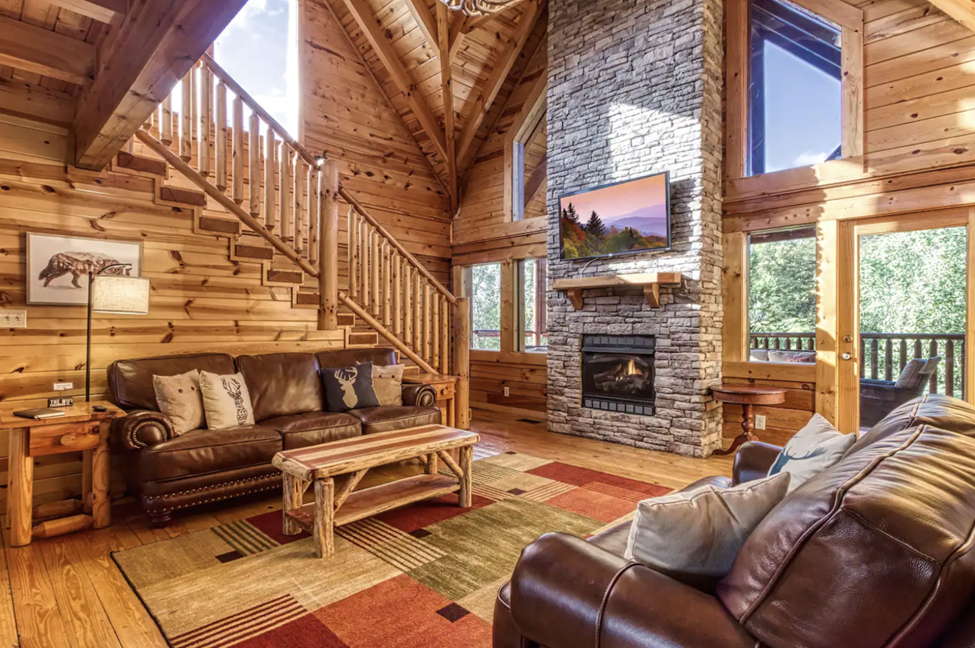
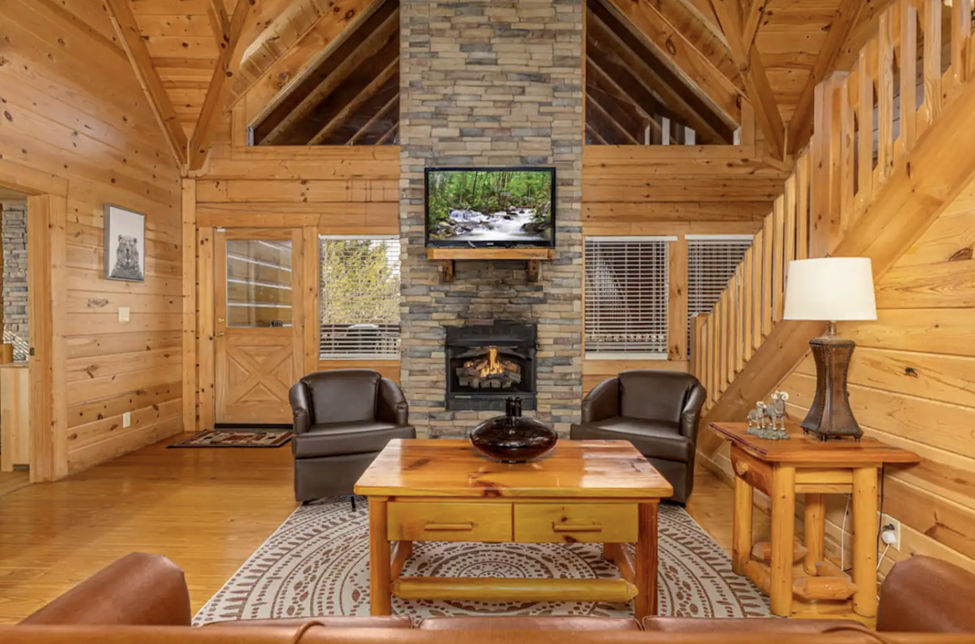
By contrast, Uncle Buck’s Cabin uses all the natural light it can in this living room shot. The result makes the space look a lot more dreamy.
Remember there are different types of natural light. Ask any professional photographer, and they suggest you make the most of the golden hours of the day, the early morning or late afternoon, as this is the optimal time when the light is diffused and soft. The golden hour light blurs imperfections and adds a natural glow to everything, which will make the place look more dreamy, secretly tapping into viewers’ emotions.
Staging Some Ambiance
Taking photos of your property is a special occasion, so clean up, tidy up, and flower up. Use what you have in your favor, set the stage to create that picture-perfect interior, and form an emotional connection with your potential guest.
Staging & Coloring
Sprucing up the ambiance with plants, flowers, candles, and lovely cushions will make your place more attractive. You can also use props such as magazines, books, or a bowl with fruits to prevent your photos from looking like a catalog. Prop styling will also tell a story and show people how they can use the space — once again, tapping into their imagination.
With staging, it’s an excellent idea to give viewers a hint of what you offer inside the drawers. You can set the table for dinner and show off your tableware. Likewise, you can leave certain appliances on the kitchen counter, such as the coffee machine and toaster. But be mindful of cluttering; do it in an organized way and avoid objects that are too distracting.
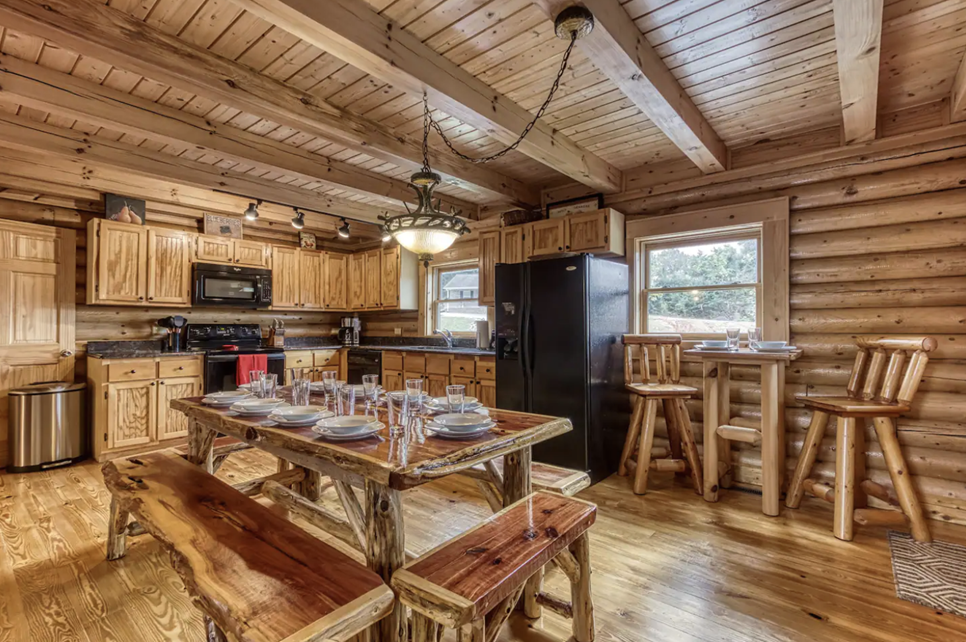
This shot of Uncle Buck’s Cabin reveals a lot of what they have in the drawers, shows how the kitchen is equipped, and gives a sense of how guests can use the spaces. It also helps them to imagine themselves in it, having dinner or cooking with family or friends.
When staging, get ready to move stuff around. Things don’t always look the same on camera as they do to the naked eye, so you might want to check your photos and make adjustments, moving objects around and changing a bit. Extra staging tip: snapping spaces with colorful or bold pieces can help establish contrast and make your photos pop up.
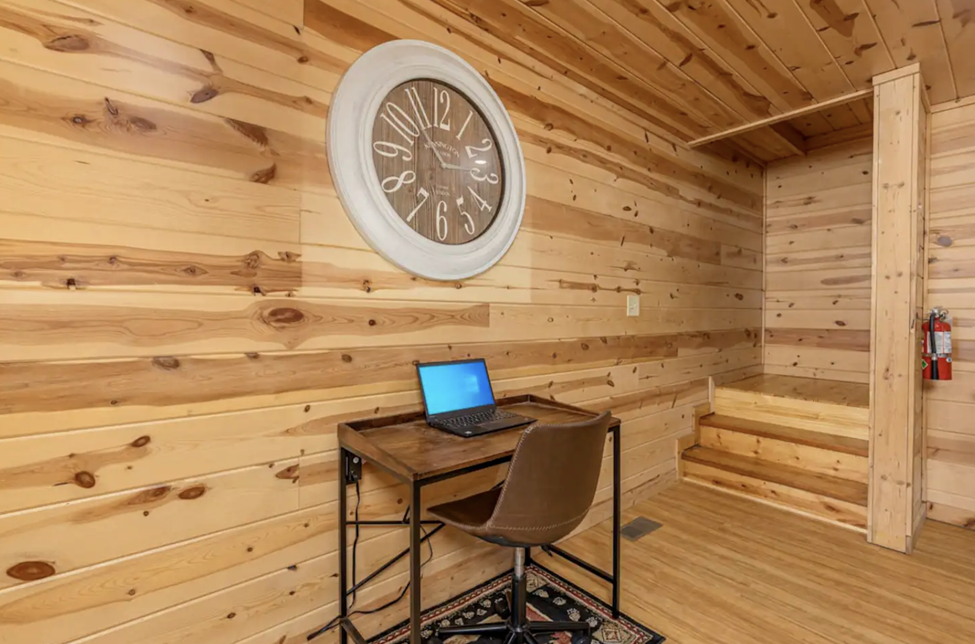
This picture of the Pinewood Lodge is helpful because it tells guests they have space to work. But it’s pretty dull. A touch of color with a nice artwork or a plant would have made it more enticing.
Framing & Composition
Photos can be revealing, but they can also be misleading. As mentioned above, what you see with a naked eye can often look very different on camera. Here are a few technical tips to take every click to the next level.
The Right Angle Matters
Have at least two or three good wide shots that showcase the whole layout of the space. Picture an imaginary grid and try to get your lines straight as much as possible. It helps to have your camera at eye level and parallel to the floor. In photography, everything looks better when it’s nice and straight.
Still, try to avoid shooting flat walls if you can, as this can make everything look smaller. Instead, look for a corner you think looks good and shoot it. This adds a sense of perspective and helps the viewer estimate the size of the space. It’s also a good idea to include a bit of the floor to show dimensions and heights, especially if you have a nice rug to feature.
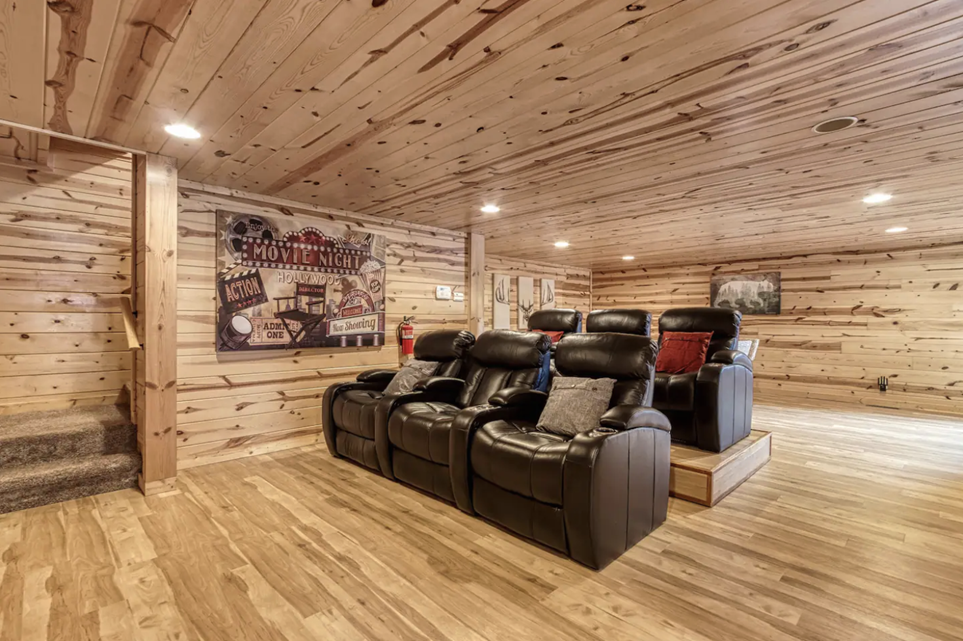
This shot of the cinema room at the Groundhog Heaven aims at a corner and includes enough flooring to show space and dimension. If they aimed at the wall, the sense of space would have been lost.
Extra angle tip: cameras should always be high enough to show table tops and the top part of beds.
Find your Focus
In most rooms, you often have a centerpiece or a most impressive feature. Use that to your benefit. Capture some shots focusing on the elements that add character and personality to the space, things like a fireplace where guests gather around, a hot tub or fire pit that defines the outdoor areas, or a unique piece of artwork that lights up the room. These remarkable features will make your listing stand out from the competition.
This Image of Pinewood Lodge looks dull and cluttered. A much better option would have been to focus on the fireplace since it’s the room’s most prominent feature.
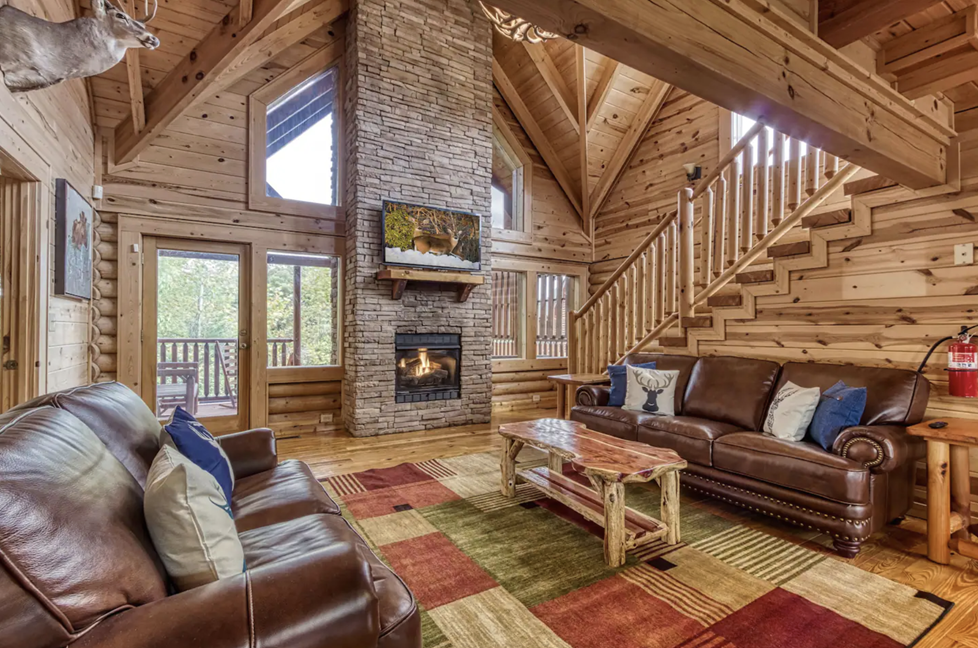
This image from Groundhog Heaven centers on the fireplace and still shows the sitting arrangements around it. It gives a sense of dimension by choosing a diagonal angle and including the floor with a carpet.
Crisp VS Blurry
Landscape shots should make the most of your pictures, but it’s okay to take some portraits if you have a unique feature or object standing vertically. Always ensure your pictures have contrast and a sharp focus to increase legibility and show crisp details, especially with wide shots. Only detail shots can have a selective focus and a blurred background effect.
Should I Use My Smartphone to Photograph My Rental?
It’s not always possible to hire a professional photographer or even to have a professional camera at your disposal. Nowadays, smartphones have great cameras, and most of them are capable of taking photos of your rental.
Again, all the rules above apply. If you do a good job of staging, composing, and choosing the correct settings and lighting, your smartphone photos will have great potential.
Some extra tips to remember when using your smartphone are to turn on the grid to help with framing, turn off your flash to avoid a harsh look, and hold your phone at eye level, in landscape mode, parallel to the floor.
If you look at the photos you can see that a slightly wide angle lens is used and they all have a touch of HDR style. That type of look is still hard to capture on a phone currently.
However, you should choose to either go fully DIY and upload your smartphone photos or use only pro shots. Mixing both will only highlight the disparity in quality and make your album look confusing. If you have the means, though, hiring a pro with a trained eye and proper gear is the way to go.
Improve Your Rental Photos and Increase Nightly Rates
Your photographs should celebrate your space. Think about what you like the most about it, capture it, and present it to your viewers in a way that tells a story. Remember: these pictures also speak about you. If they look professional, you too will look professional.